
Since we moved in, the front garden has been messy uneven brickwork. Someone who lived here a very long time ago spent a lot of effort arranging the brick pavers in a circle pattern, but there were two problems. Firstly, the circle pattern means there are a lot of big spaces between the rectangular bricks – and these spaces get more and more full of weeds over time. Second, the little trees they planted turned into big trees, and the roots had lifted all the bricks unevenly, and so the gate no longer opened without contact with the bricks and the walking area was one big trip hazard.
Starting point – very uneven brickwork, poorly maintained beds, massive weed problem:
It’s easy to see how the bricks were lifted up by the roots of the big plane tree here, and how the tree has outgrown the original corner placement, and is butting up against the brickwork. It’s also very close to making the garage wall crack, and will probably have to be taken out in five years or so.


The sheer volume of weeds that had taken root in the brickwork was proving uncontrollable, and there was no real option to lifting the bricks to clean out the organic matter and replace the soil with riversand.


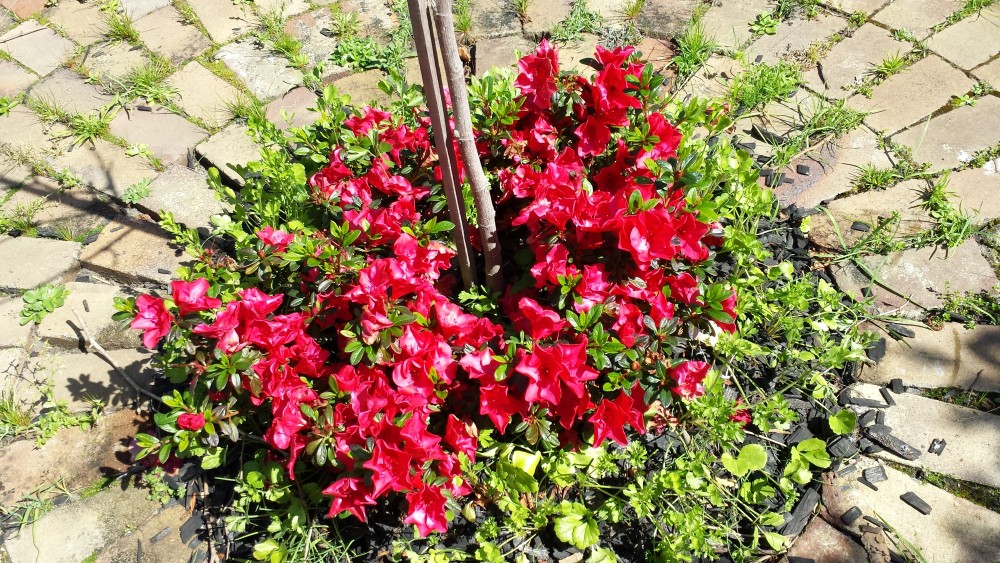
In the center of the garden is a small beg with a magnolia tree in it. I’m hoping to have the magnolia take over the garden so that when the Plane Tree has to come out there is another tree in it’s place. This bed is big enough for the magnolia to grow in for the next 20 years easily. While the bricks were up, I ran an irrigation pipe to the bed to water the azaleas and the magnolia. It stayed this size:
This is the before shot of the far corner – the bird’s nest fern is the feature plant that I kept in that corner.

I planned to build boxes around the beds using thick sleepers, and to leave strategically placed gaps for drainage as the slope of the land is not great for drainage. There was concern that switching from the circular pattern to a herringbone pattern would make the front look like a parking lot, so after a bit more planning, I decided to retain the circular pattern set of circles in the centre. These were the most level bricks, so I could also get away with lifting, cleaming the weeds out and replacing and skip re-levelling the sand. This did mean a lot of hand-cutting bricks to fit the circle, which was a lot more work than I had anticipated.
It took most of the first weekend just to get to this point:

Progress was very slow initially as the area along the garage wall, and close to the Plane Tree had roots lifting the bricks, and those roots were as thick as an adult’s arm – some more like an adult’s leg.

The design I had in my head had two large square boxes in the far corners, to break the rectangular pattern, and plant placement made this work. The large bird’s nest fern in one corner and the large tree in the other both fit perfectly into a 1.8m x 1.8m square. I also made the corner boxes slightly elevated to break the top line and step it slightly. The ground is so flat that wasn’t really necessary – aesthetic only.

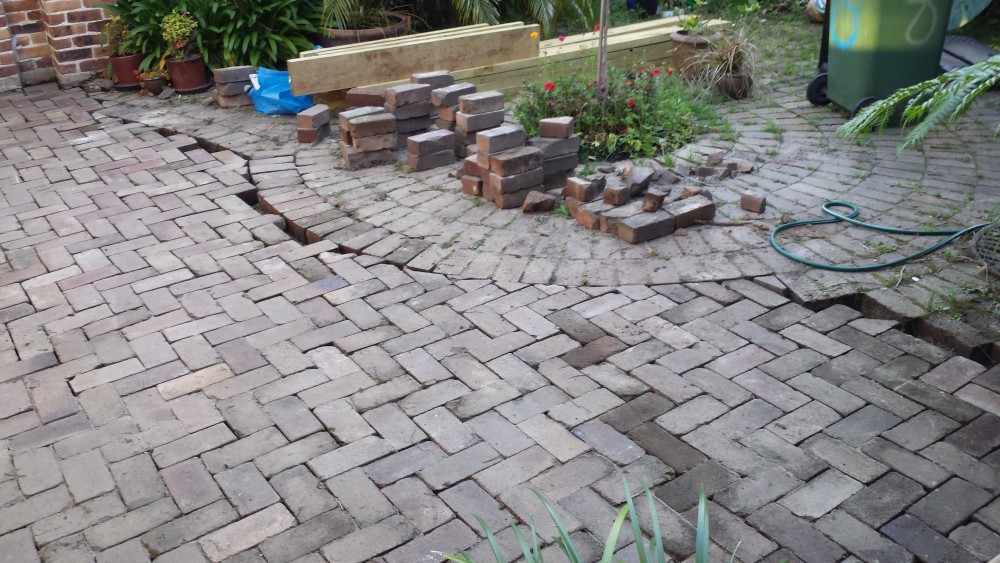
Thankfully I have a very patient wife and so I got away with leaving the front of the house looking like this, with piles of bricks and timber for the better part of two months. The material costs for the whole job came to around $200, Mitre 10 Mascot supplied and delivered the sleepers. Cutting them was a little tough, as the timber was still a little wet, and my circular saw doesn’t cut as deep as the timber – so it required patience and cutting from both sides to meet in the middle.

I worked in a wave from left to right, and following is how I joined the two patterns up. Cutting the bricks to fit around the circle requires cutting each one by hand, and measuring to fit – each is different. Because I filled over with riversand at the end, thhere is leeway for some rough fits. The riversand does a good job of hiding any larger-than-you’d-like gaps. The important parts are the parts you walk on or see from close-up – and thankfully I got all those right
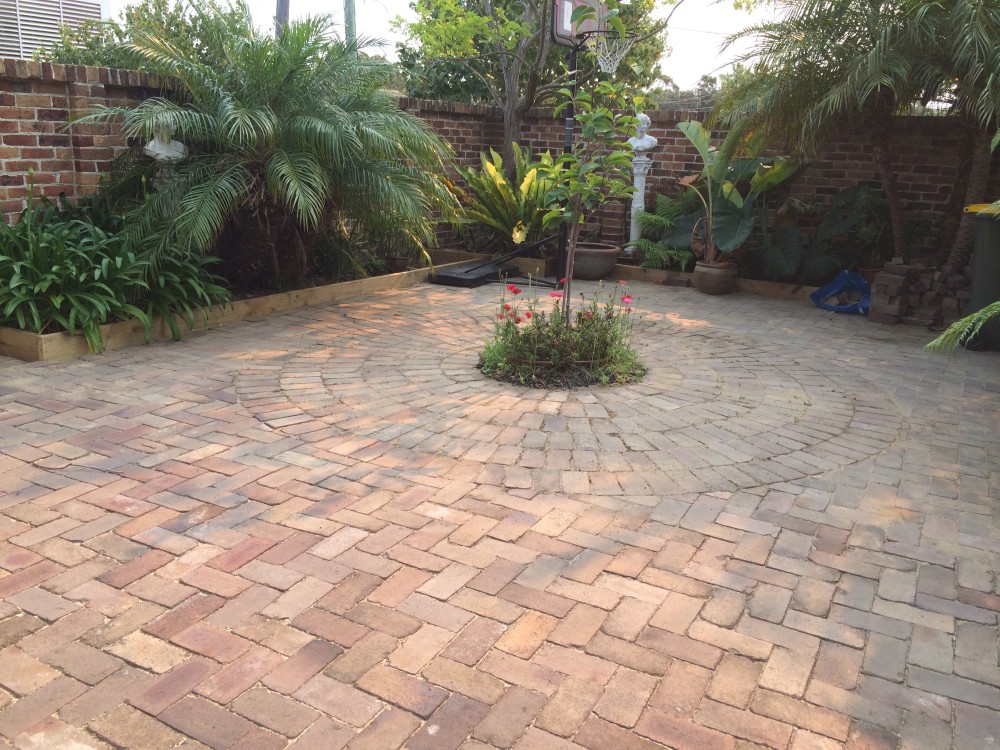
End-point: Level, tidy, even brickwork.
At the end of the very long story, this is how the landscape turned out. I’m happy with the look and we recycled the bricks meaning it was a low cost job didn’t generate a ton of landfill. The boxes keep the beds tidy and will stop the roots and soil spilling onto the brickwork again. The Magnolia tree has grown half a foot since spring started and the irrigation I’ve run out to it means I no longer have to remember to water it – so it’s even happier. In a decade, when the tree is big and if I’m still living here, I’ll put a table and chairs on the circle area under the tree. Now all that’s left is the last bit of cleanup and then on to the plants.


Mark, you have done an amazing job. What happened to the huge spider on the plant outside your bedroom? The finish is professional but your body and hands must be eina (scuse the vernacular). luv from your aunt and unc
Howdy. My wrists are still clicking from the abuse I subjected them to 🙂 Also, we had massive rains alst night and no more flooding. I call that fixed. The Golden Orb stayed for a few months but in winter she moved off. She hasn’t come back this year.This year’s new resident is something called a Tarantula Hawk Wasp. I want to get rid of it but I’m a bit scared of the sting. From wikipedia – “Commenting on his own experience, Justin O. Schmidt, entomologist and creator of the Schmidt Sting Pain Index, described the pain as “…immediate, excruciating pain that simply shuts down one’s ability to do anything, except, perhaps, scream.”